Nintendo DSi Camera
Much ado has been made of the lack of megapixelry in the DSi's cameras in Internet circles, of course, but the simple fact is that the DSi's cameras are for playing with, not taking photos that you hang above the living room couch with. This is supported by the Nintendo DSi Camera application, which is clearly developed around that premise.
You don't even need to go into Camera if your goal is just to quickly grab a snapshot. The DSi's menu has a built in quick-snapshot function that saves photos directly to internal memory. Just hit L or R once you've turned it on to pop up a viewfinder. You can either click on-screen buttons or use button shortcuts to switch between the internal or external camera and take the shot. You can also quickly jump into the Camera app from here, which you'll want to do if you want to take advantage of the many photographic toys available or save your photos straight to a SD Card.
Once inside, the first thing you'll see is a calendar. (Actually, the first thing you'll see is an extensive tutorial—but that's only for the first time.) The overarching theme of Camera is a photo diary; pictures you took on each day on the calendar are shown in thumbnail form on the top screen. You can also annotate each day with a small handwritten note. The album view also lets you tag each photo with a star, clover, or heart; star-tagged photos will show up in rotation on the system menu.
Of course, when it comes to actually take the pictures, you can be boring and take a normal shot, and get a camera-phone-quality 640×480 image. But you can also choose one of many live "lenses" that change the image:
The Distortion lens is probably the coolest one. By touching the screen, you can nudge the image, stretching bits and pieces and squashing others. (It's important to note that with this and the other distorting lens that the preview shot can look pretty poor-quality—but when the shot is actually taken, the resulting shot is markedly better quality.)
The Graffiti lens lets you draw with several colors and thicknesses of pens as well as place a handful of stamps on your photo such as hearts and speech balloons.

Color gives you a black and white image, and you can selectively restore colors to it by tapping regions of that color. It's not selective, though; if you tap one brown area (or a similar color), brown will be restored to the entire image. Colorpad uses a similar algorithm as Color, but starts off with a color image and changes the color of the area you've tapped to some other random color.
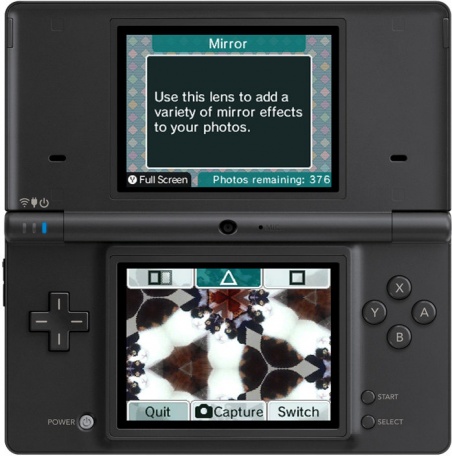
Mirror offers several reflection options, from a single dividing line to kaleidoscope-like triangular and square reflection shapes.
The Mischief lens is one of several that uses heuristics to identify someone's face in the shot, and then add something like aviator sunglasses or a curly moustache which then tracks the person's face as long as it can still make it out. I've found it's a little tricky to get to work properly, but it does an admirable job.
Emoter uses the same face-tracking as Mischief, but then applies one of three fixed distortion patterns to change the expression in a comical fashion.
The Merge lens prompts you to take shots of two faces, then lines them up for a morphing effect. I'm not particularly impressed with the quality of the morph. As long as you're taking two face shots, you can also check out the Resemblance lens, which will give you a percentage readout for how closely each face resembles the other.
Finally, the Frame lens offers a number of preset frames—basically, overlays—that you can lay over a picture. Been there, done that, got the T-shirt, but you can also make your own frames. One of the things we had fun with at home today was taking a picture of someone, then making our own frame by chiseling out the eyes and lining it up with someone else's face.
All of the above frames are available in the viewfinder, as you prepare to take a picture. You can also take any saved picture and apply any of the above lenses except Frame. And, of course, anything that you've saved to the SD Card can be downloaded onto a computer with an SD Card reader. (Pictures and frames can be moved back and forth inside the "Other" menu.)
Since we had so much fun doing this, I wondered if it might be possible to load some previously-taken photos into the DSi to play with them. Sadly, it doesn't seem to be possible. I tried copying them into the folder on the SD Card where Camera stores images; they were ignored. I tried resizing them to the 640×480 resolution the DSi uses. I even tried overwriting an existing picture on the SD Card with a new photo, properly resized—this actually showed up as a "broken" picture. It seems we're not meant to load our own photos into Camera.